Approving an Account or Store to Import Orders
First you will need to have the account or store approved to import orders.
You are able to do this under the account or store homepage under the Tasks dropdown > Edit Account/Store Features. Then select Allow importing orders > Save.
Once you have done this, you will see the option for Import orders on the homepage under Orders. This is where you are able to import orders via CSV.

3PL Orders
This offering is specific to STAHLS' Fulfill Engine Decorator Pro accounts doing volume in-house, or Seller Pro on the Discount Tier 1 or Discount Tier 2 plan with pre-approval.
If you have orders that are not on-demand or offline orders, you do have the option to create a 3PL product within the store.
The CustomOrderId would be an external id for where you are getting orders from. If an order is comprised of multiple SKUs, then you'd have more than one row but the same CustomOrderId value, to say that they ship together.
We then pull the shipping address information from the first row of the order and ignore those values on the additional rows.
On-Demand Orders
To communicate the design, the most common method is to prebuild a product within an account to generate the design ID. This provides the file, size, and placement for production. If this is an existing store, the design ID will likely already be created.
The product ID and color must match what is shown within the Fulfill Engine catalog. The sizing format should be XS, S, M, L, XL, XXL etc.
You must select a single option when communicating the Product / Design within a CSV import. Although the design ID is most commonly used, you also have the option use a Campaign (Store) Product ID or an artwork URL.
Roster Orders
You will follow the above steps for on-demand orders regarding the product ID, color, and sizing formats.
For roster information, you will use the fields Customization_RosterField_JerseyName and Customization_RosterField_Number. These values will map to any customization areas on your product connected to those roster fields. This means, if you have both a front number and back number and both are connected to the number roster field, you only need to enter the number once in your CSV and it will sync to all set locations.
Roster values do not need to be present in a store roster to be used via import. This means you do not need to build out a store roster beyond the placeholder information if you don't need your roster to be live and visible in your store.
In order to create a product with roster customizations, your store must have at least one roster. However, this roster does not need to be complete. We recommend having at least one entry, just so you can easily visualize your customizations when building out your product.
Once you have a placeholder roster in your store, you can build your roster-enabled product(s).
Learn more about rosters and roster-enabled products here.
Formatting CSV for Importing
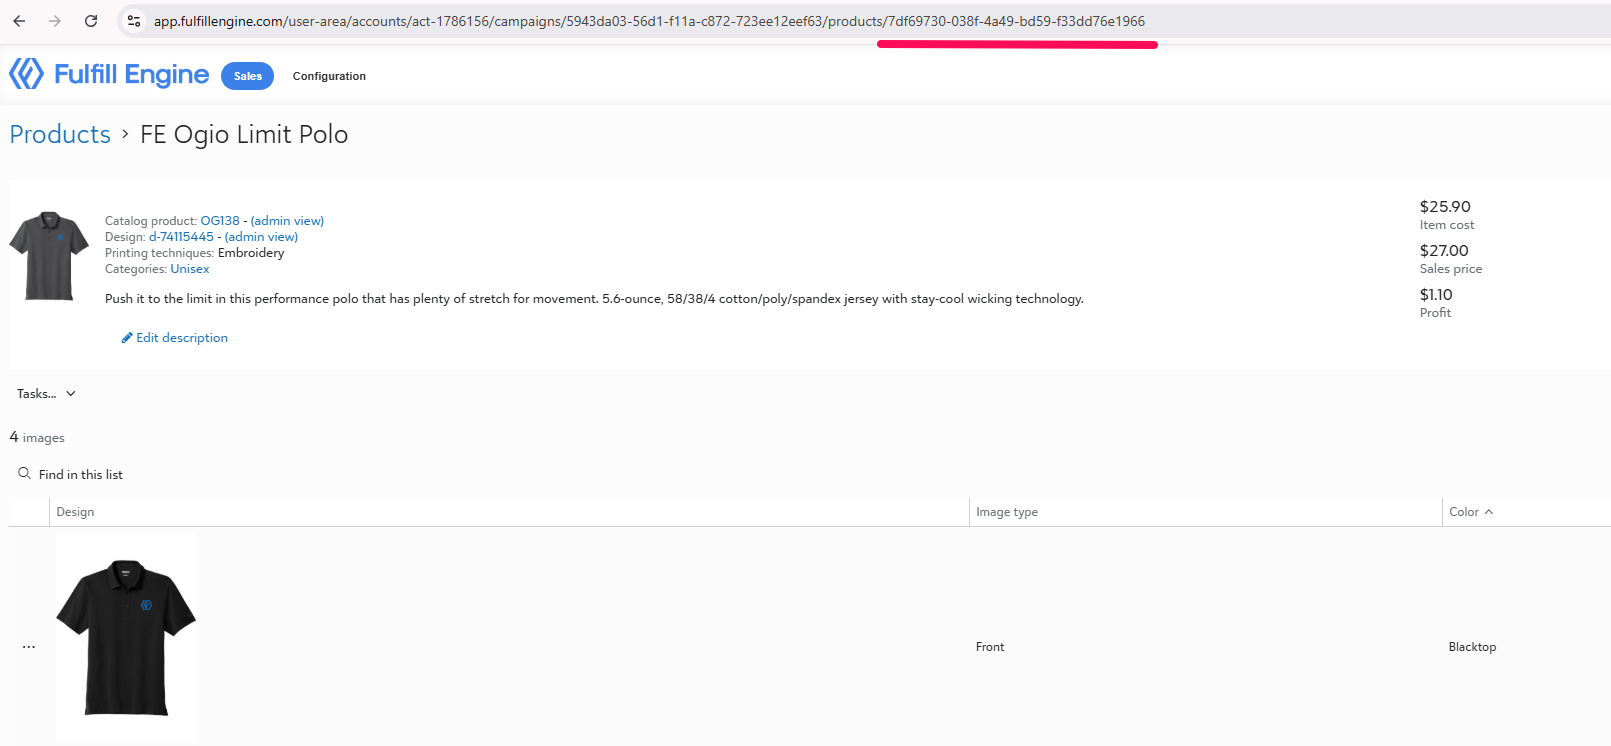
Using a Campaign Product ID
This method is similar to the Design ID, in that you are using a prebuild product within a Fulfill Engine store. The option provides production with the Design ID as well as the product. You will still need to confirm the color and size.
It can be located at the end of the URL within the product view.
See below for Product / Design (option 2) for what headers are required.
Using an Artwork URL
This option exists for all on-demand methods except for Embroidery. To substitute the design ID, you must use the fields below, where the Artwork URL provides a print-ready image, sized appropriately.
- Artwork1_ArtworkFileUrl
- This must direct to a PNG formatted file
- Artwork1_MockupUrl
- Artwork1_PrintingMethod
- dtf, dtg, embroidery, engraving, heat_seal_patch, screen_printing, uv
- Artwork1_PrintLocation
- View approved values here
See below for Product / Design (option 3) for what headers are required.
Approved CSV Headers
| Address | ShippingAddress_Name, ShippingAddress_AddressLine1, ShippingAddress_AddressLine2, ShippingAddress_City, ShippingAddress_State, ShippingAddress_PostalCode, ShippingAddress_Country, ShippingAddress_Phone |
| Customer PO Optional |
CustomOrderId |
| Confirmation Optional |
CustomerEmailAddress, OrderConfirmationEmailAddress, ShipmentConfirmationEmailAddress |
| Product / Design (option 1) |
CatalogProductId OR GTIN, ProductColor, ProductSize, Quantity DesignId |
| Product / Design (option 2) |
ProductColor, ProductSize, Quantity CampaignProductId |
| Product / Design (option 3) |
CatalogProductId OR GTIN, ProductColor, ProductSize, Quantity Artwork1_ArtworkFileUrl, Artwork1_MockupUrl, Artwork1_PrintingMethod, Artwork1_PrintLocation |
| Product / Design (option 4) |
CatalogProductId OR GTIN, ProductSize, Quantity NoDecoration |
| Roster Fields (option 5) |
CatalogProductId OR GTIN, ProductColor, ProductSize, Quantity
Customization_RosterField_JerseyName , Customization_RosterField_Number , Customization_RosterField_Team |
| Production Optional |
Priority, Quality, ShipmentFulfillmentNotes |