What You Need
- Standard DTF equipment
- Computer Terminal
- Windows required to use the application offline, however MAC is available via the website with the use of Wi-Fi
- 2D QR Code Scanner - recommendation
- You will need one QR code scanner per decoration station
- Shelving unit
- Recommended for holding batched bins from receiving
- Film Transfer Organizer - link to purchase
- Table (optional)
Recommendations for setup of STAHLS' Hotronix® ProPlace IQ™
This is an additional supported feature for those using a Hotronix® Dual Air Fusion heat press.
- Monitor mount arms - link to purchase
- One (1) per station or two (2) per dual air max
- Recommended Touch screen monitor - link to purchase
- One (1) per Mini PC. This is a great option to remove a mouse and keyboard at the station.
- HDMI cable for screen - link to purchase
- HDMI cable for projector - link to purchase
Missing something? View our Equipment and Material list for quick reference links of where these items can be sourced.
If you are sourcing your UltraColor MAX™ Direct to Film Transfers from STAHLS' - below are some tips to ensure you press is set up correctly.
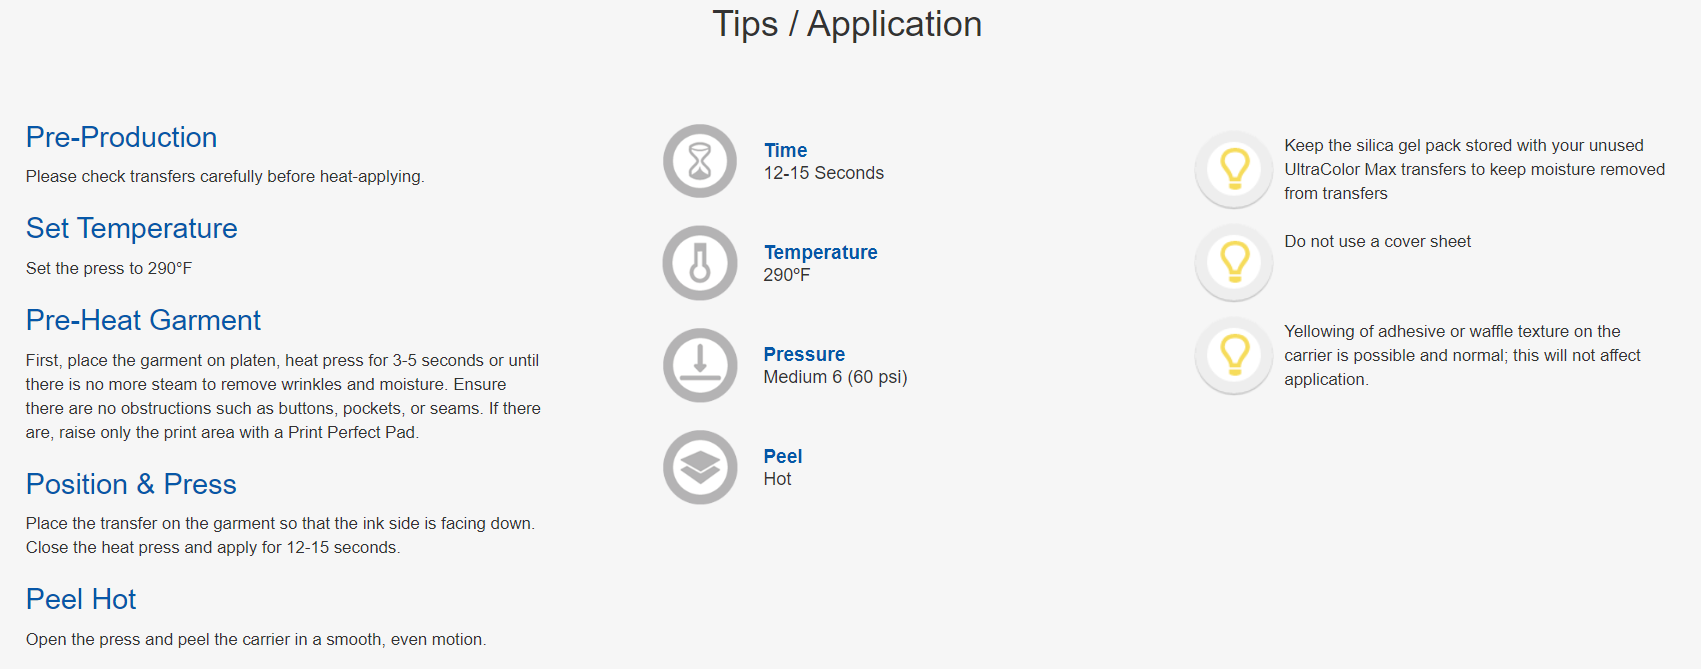
If you are producing your own transfers in-house you will need to know your DTF equipment settings;
- Pressure Setting
- Heat Setting
- Time Setting
- Peel Setting (cold peel or hot peel)
From the Fulfillment tab you will select either the Heat transfers and patches or DTF Application tile, depending on your subscription level.
Scan, or input, the QR code and the system will populate a rendering of the garment as well as placement.
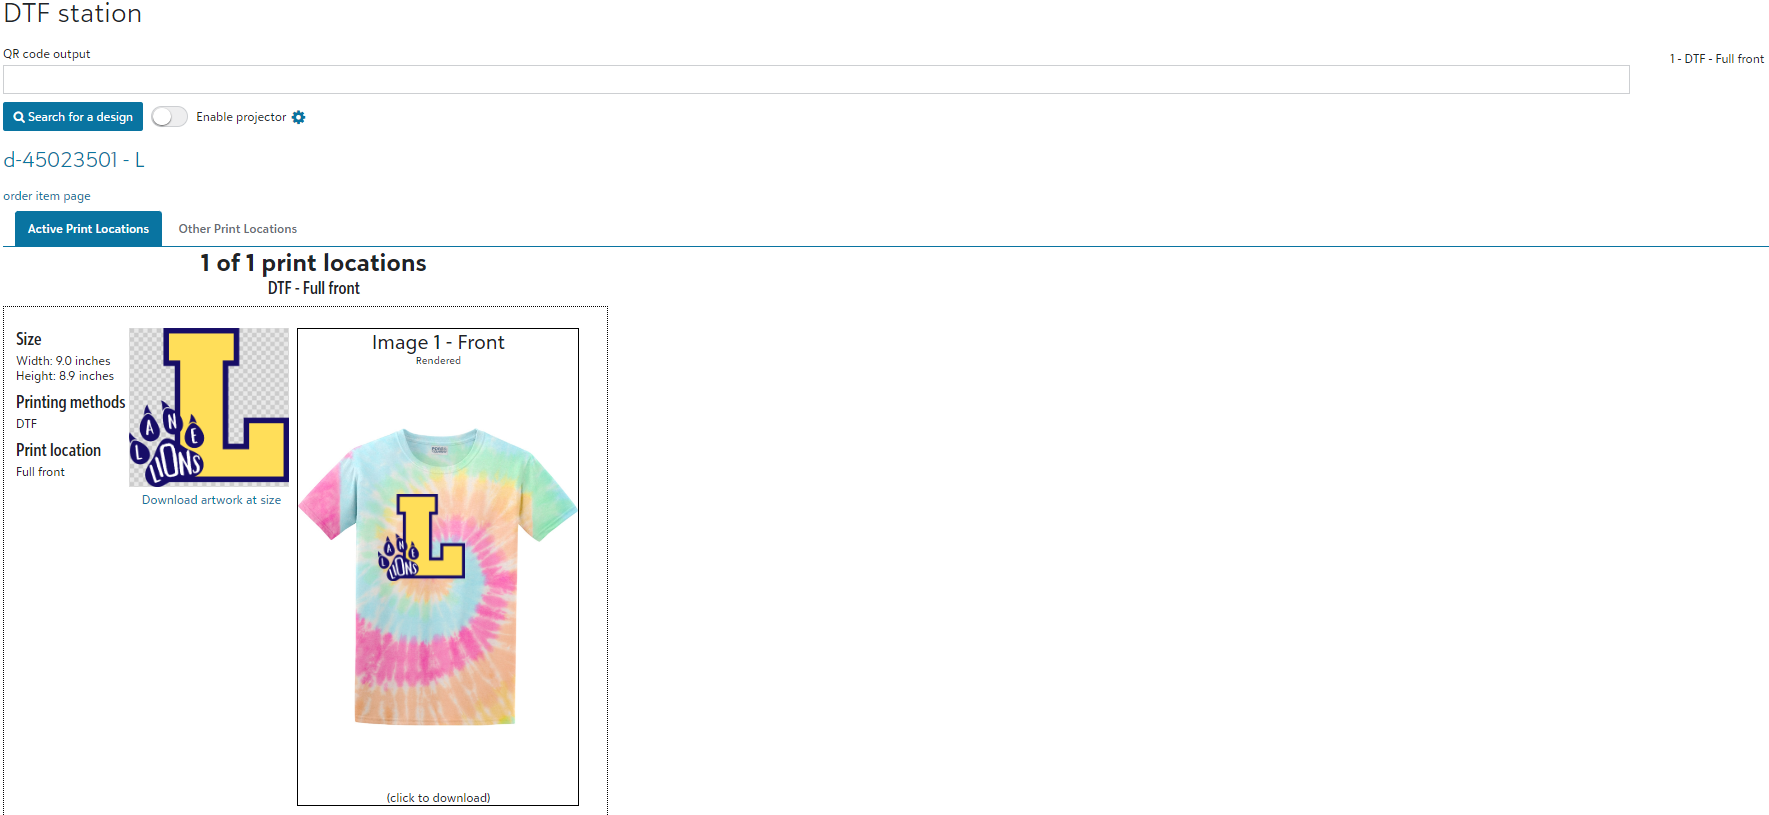
You will then locate the corresponding transfer sheet using the identifying code on the transfer.
To match the transfer to the garment, you will look for the Batch ID and coordinating Film ID.
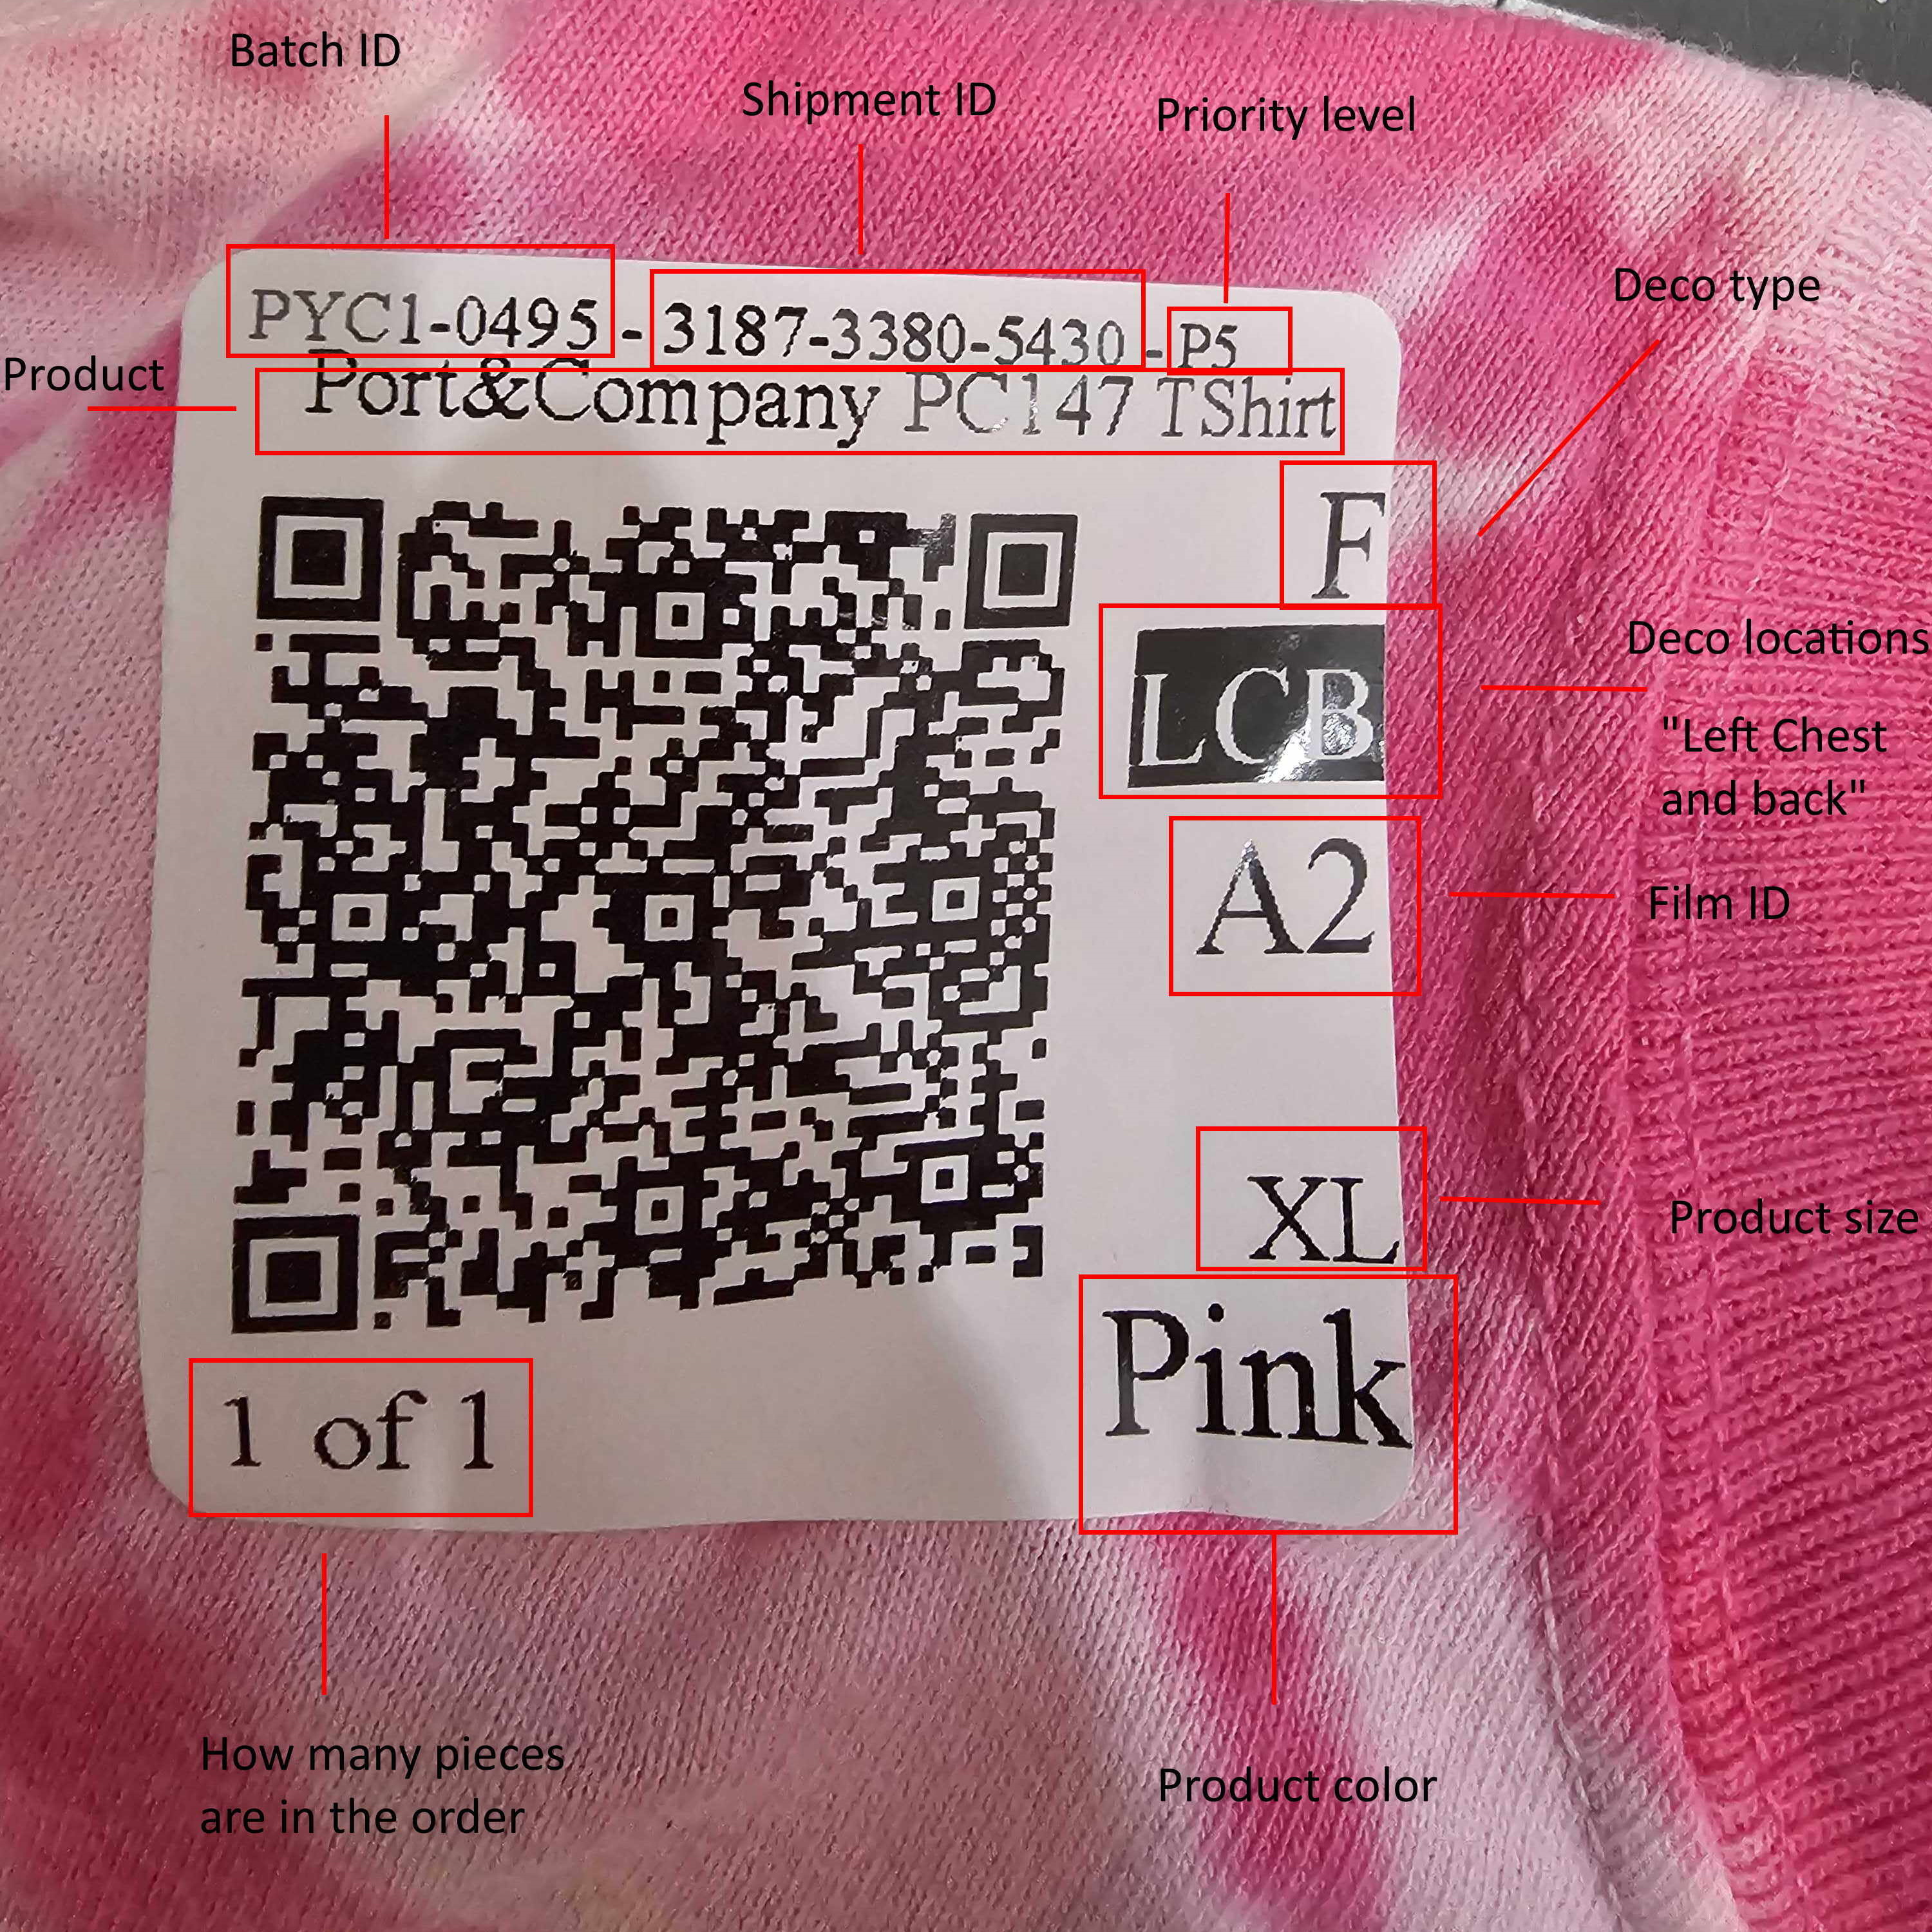
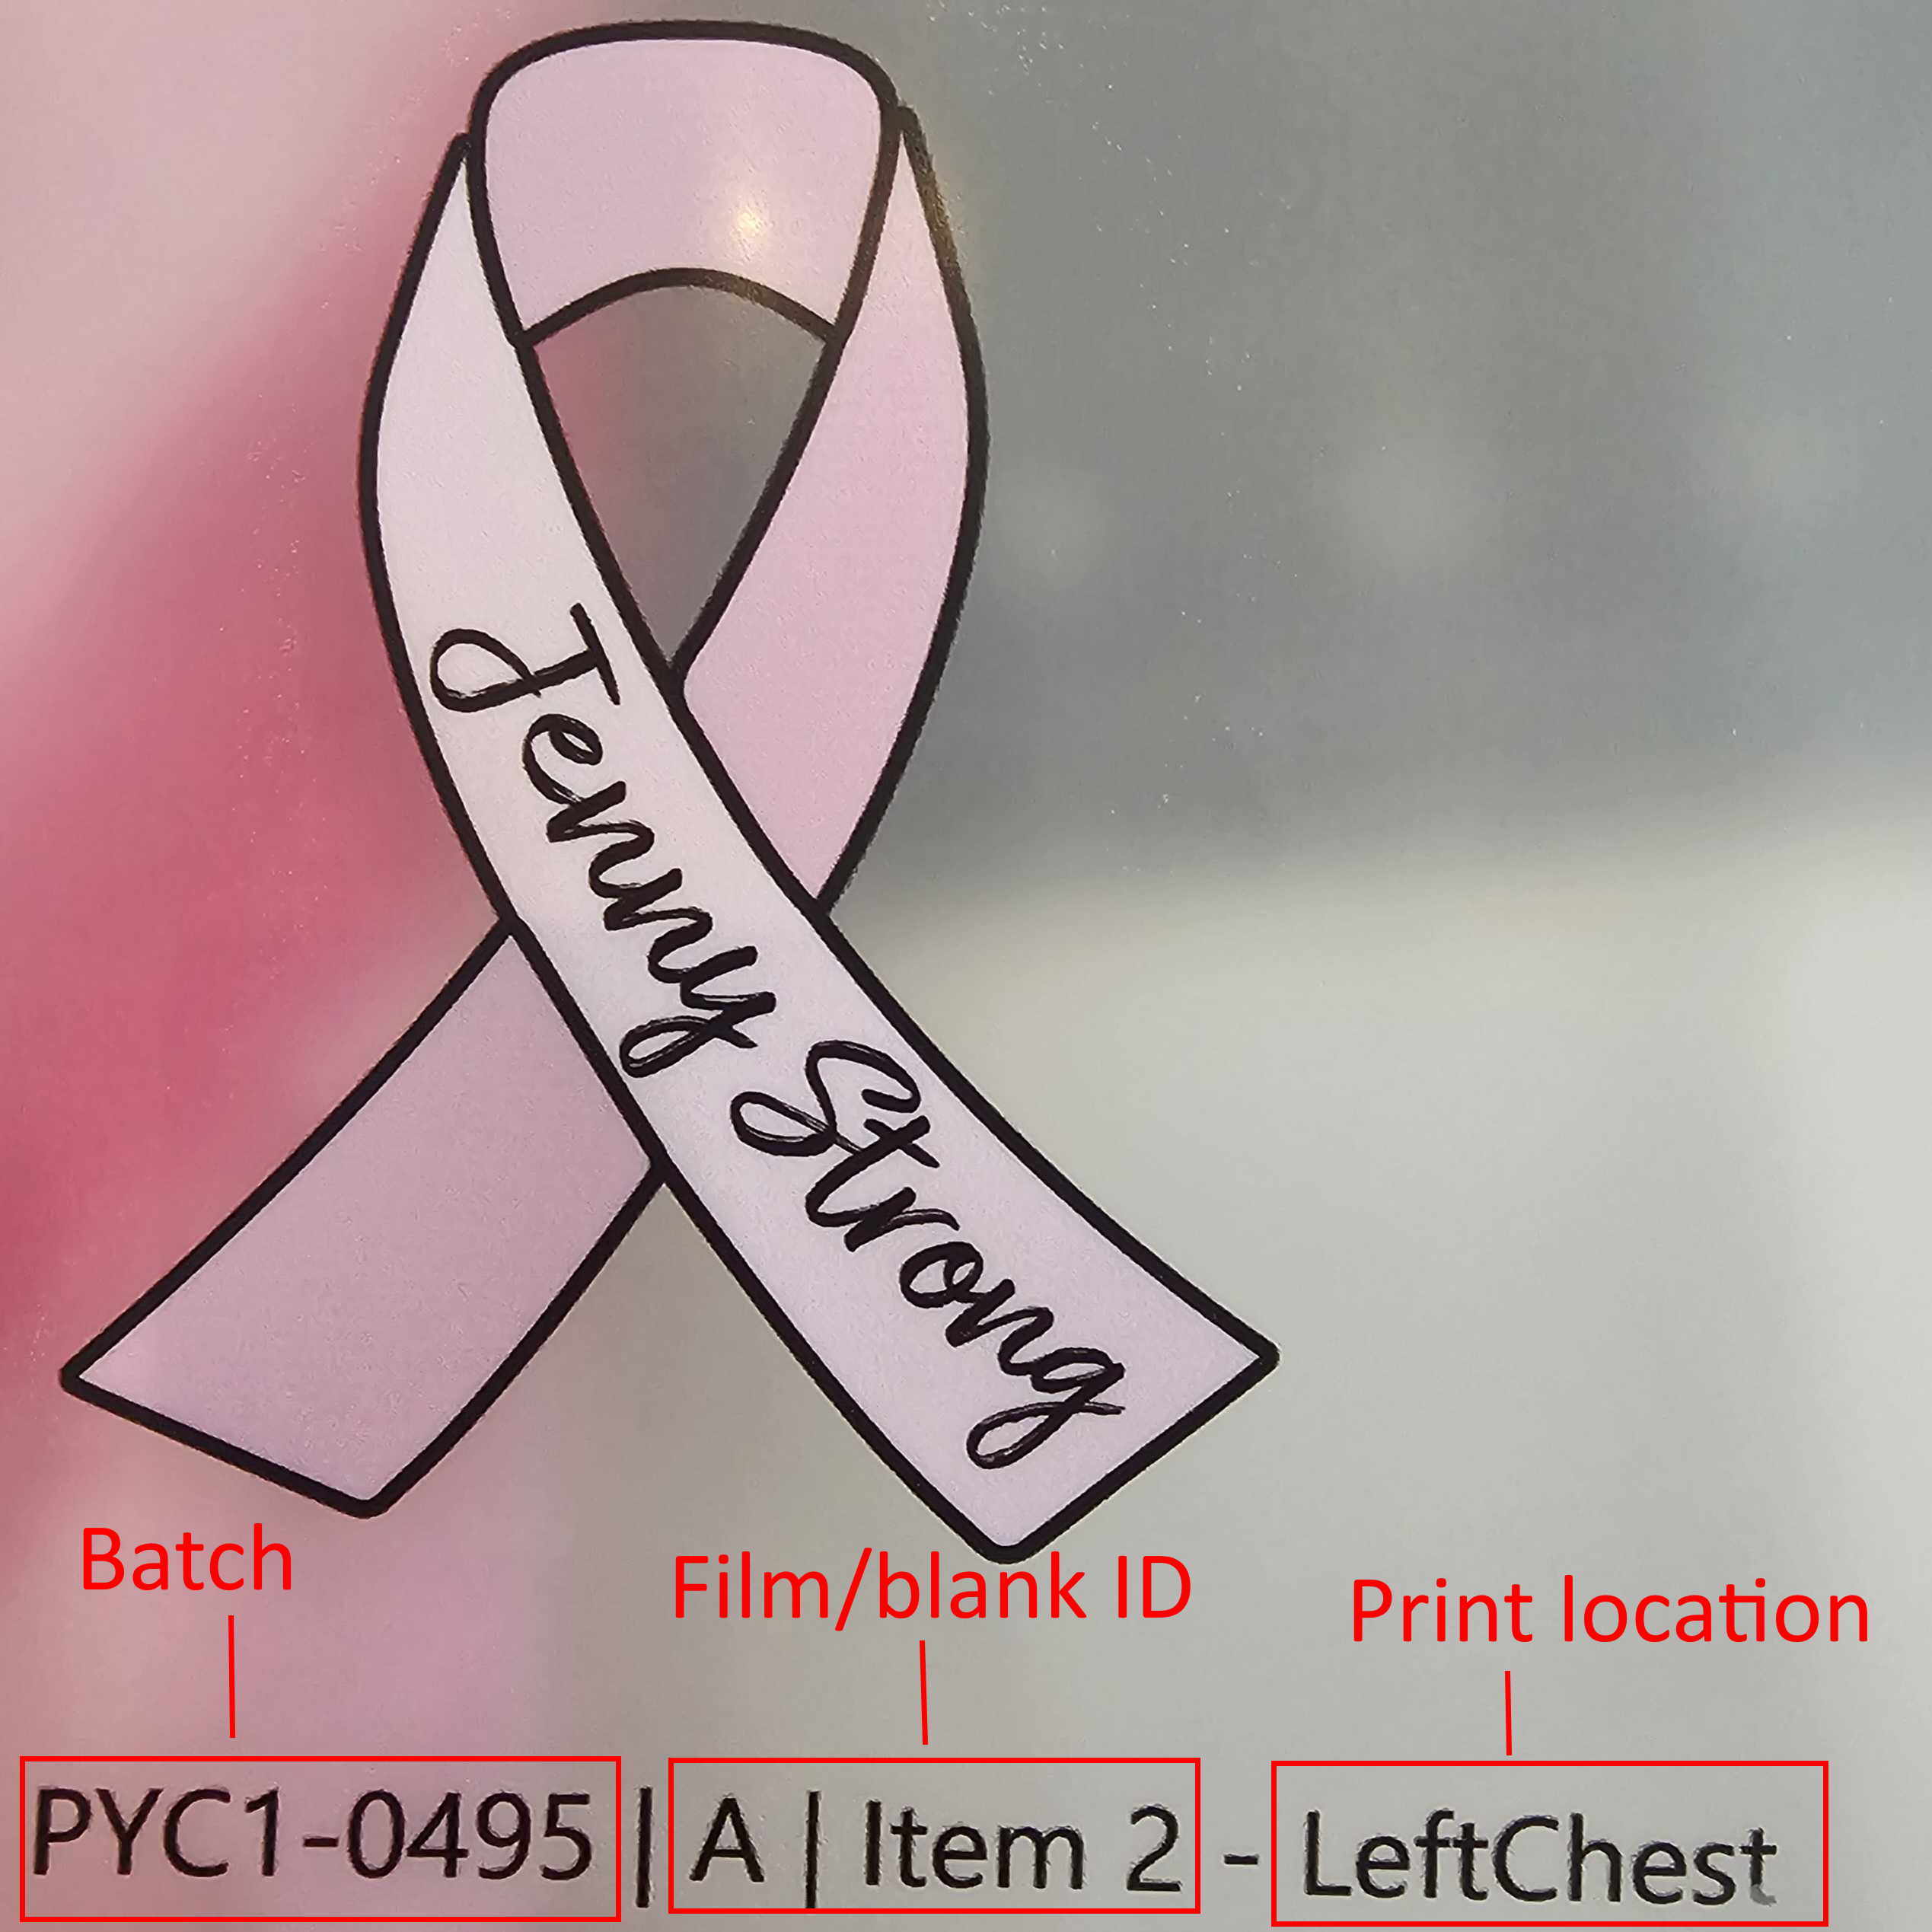
With multiple transfers of the same design, the transfer will show by design ID instead of per garment.
Before applying the transfer, pre-press the garment to remove the moisture and flatten the fibers. In addition, you will need to cut off the identifier prior to apply it to the garment.
Load the garment according to the rendering and start application.
Once completed, you will remove the film and send the garment to shipping.