Unleash the power of precision printing, rapid production, and heightened efficiency with the revolutionary Hotronix® ProPlace IQ™.
STAHLS' Equipment Recommendations
- Monitor mount arms - link to purchase
- One (1) per station or two (2) per dual air max
- Recommended Touch screen monitor - link to purchase
- One (1) per Mini PC. This is a great option to remove a mouse and keyboard at the station.
- HDMI cable for screen - link to purchase
- HDMI cable for projector - link to purchase
Your PC will need an HDMI port for the Pro-Place as well as a second HDMI port or VGA/DVI for the monitor.
Setting Up Your Hotronix ProPlace IQ™
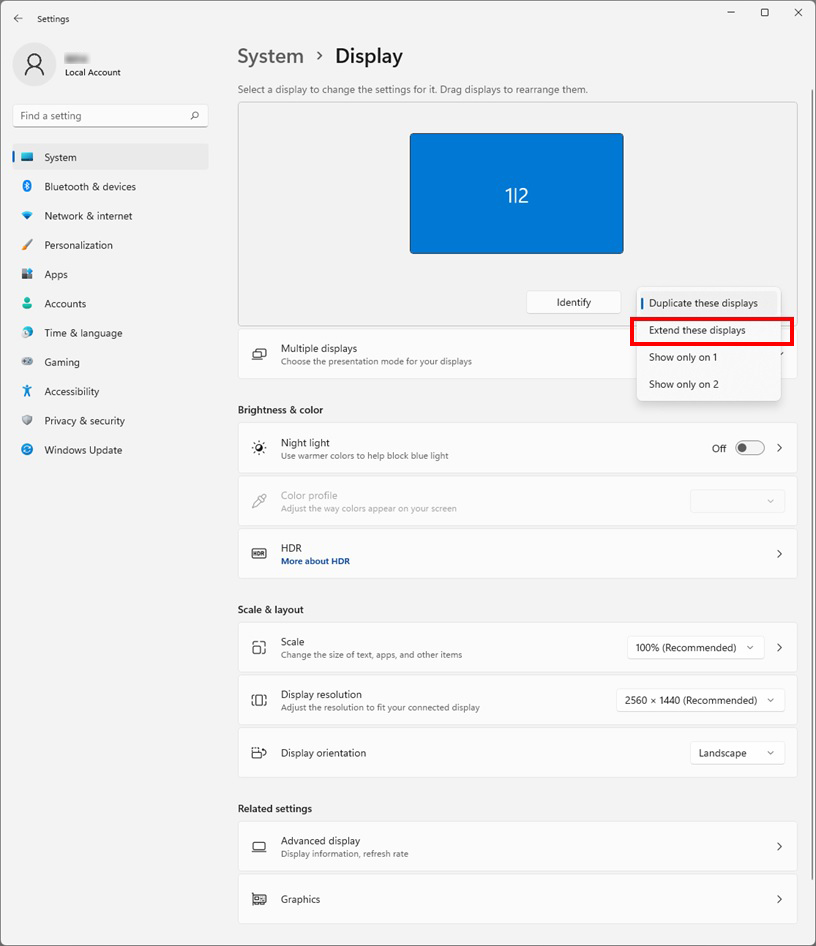
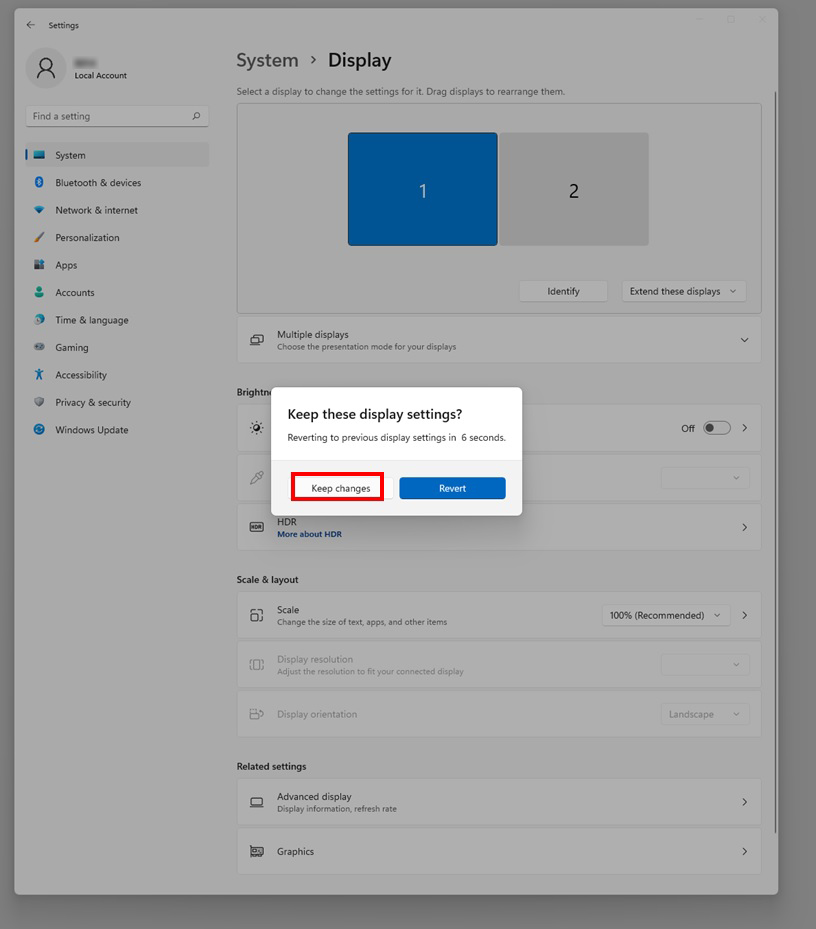
You will use the HDMI cable to connect the computer terminal to the ProPlace IQ™ projector before setting the two monitors with extending view by going to your Windows desktop > System > Display > "Extend"
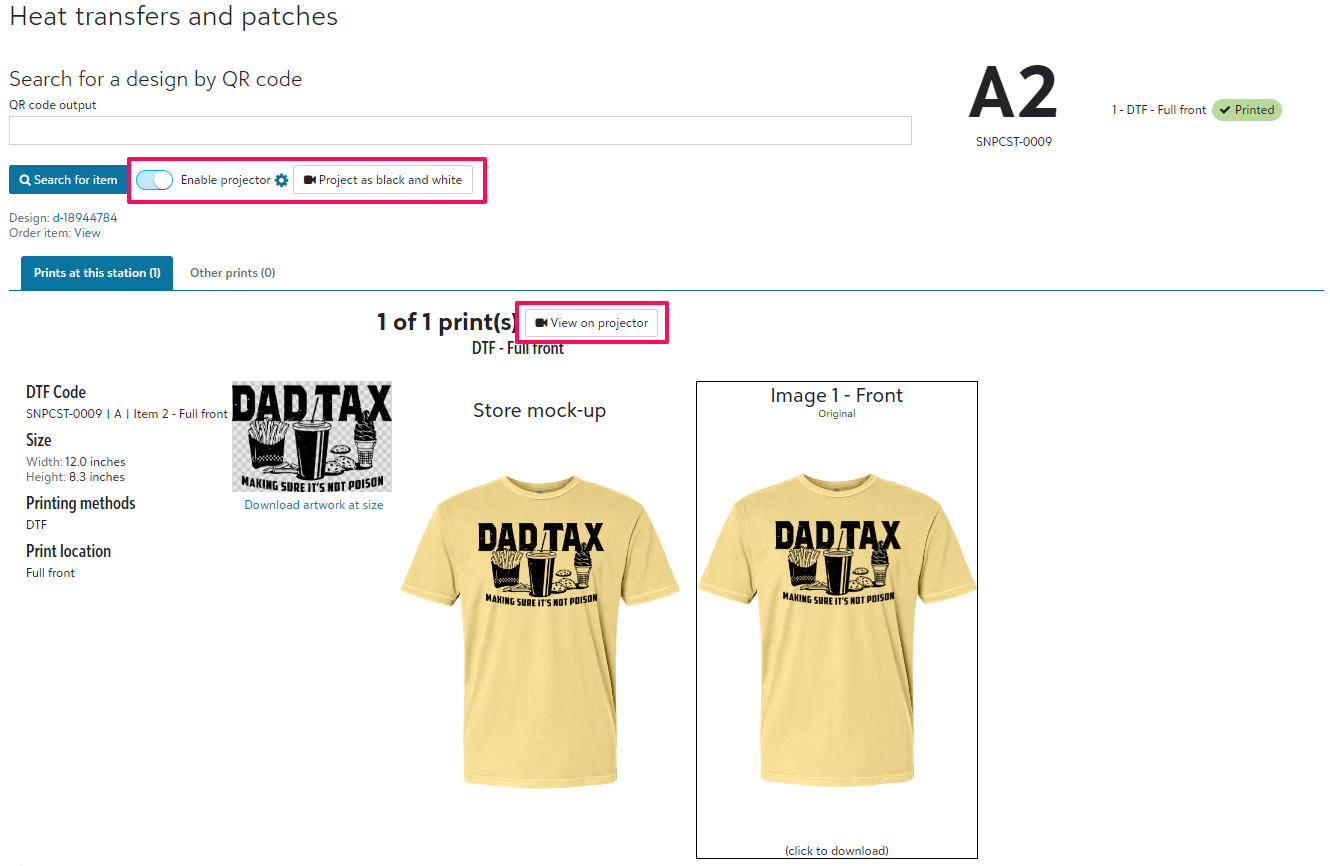
Now you are ready to start using the projection! Before scanning the QR code, you will select to Enable projector.
In addition, you have the option to alter if the projection will be in black and white, or color by selecting the offering to the right of the toggle.
When you scan a QR code and a second tab will populate. You will need to move the second tab to your second display (projector). Then, to move the projection to full screen, you will select F11 on your keyboard.
The projection tab will automatically refresh with new artwork each time a new item is scanned! If you accidently close the tab, you will be able to select View on projector to pull the secondary tab up again.
Adjusting the Projection
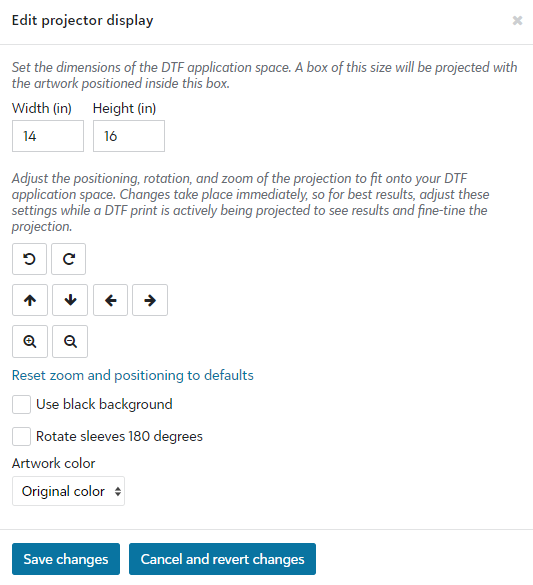
To the right of the toggle, you are able to select the gear icon to make adjustments. When you make changes here, you will see the projection adjust in real time.
The box represents the dimensions of the DTF application space. These settings will automatically save, but can be adjusted again as needed.