This integration does not currently support Embroidery.
Customily is a product personalization software that allows your customers to add custom text, images, and designs to products. When integrated properly with your FE-connected Shopify store, custom orders will flow seamlessly through to Fulfill Engine with all design files and specifications intact.
This guide will walk you through setting up Customily to offer personalized products to your
customers while maintaining seamless integration with Fulfill Engine.
Before starting this process, ensure you have:
● An active Fulfill Engine account
● A Shopify store
● A Fulfill Engine store that is connected to your Shopify store
● Administrative access to both platforms
Setup
Step 1: Ensure Shopify-Fulfill Engine Connection
Step 2: Install Customily on Your Shopify Store
1. Within your Shopify Store Admin portal, locate and select the ‘Apps’ section on the left
navigation.
2. Select Shopify App Store on the resulting popup modal.
3. Search for "Customily" or visit customily.com.

4. Install the Customily app to your Shopify store.
5. Complete the initial setup and account creation process.
Customily offers a free trial but you must supply a credit card to proceed with the
trial.
Step 3: Create products in Shopify for customization
1. Add a new product in Shopify.
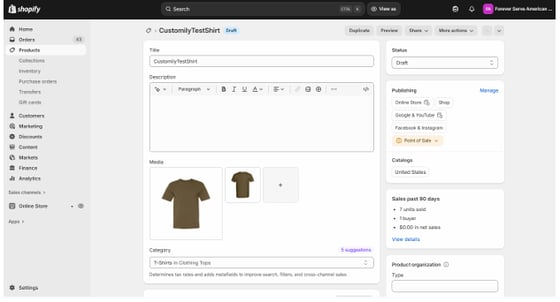
2. On the new product builder page, add the variants that your product requires.
Color variants need to match the exact color in the Fulfill Engine catalog.
You can add a custom color via hex code in this section.
3. Select one of your variants to look at just that individual variant page. For example, if you
group your variants by color, then select one of the variant sizes by clicking on a size.
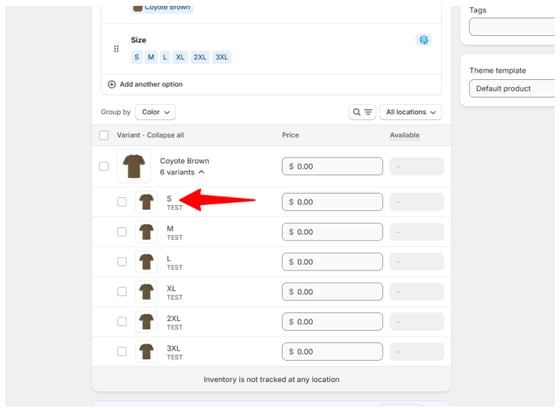
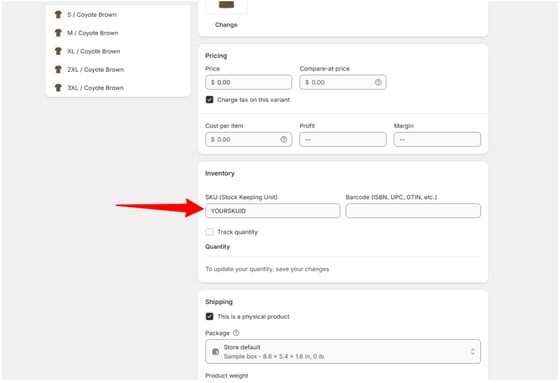
4. On the individual variant page, you will need to assign the variant (each variant) a SKU
ID. This SKU ID assignment is required in order for the product to be sent to Fulfill
Engine to fulfill when ordered. This is a required step but this SKU ID doesn’t need to be
unique.
5. On the sku page, scroll down to the “Edit locations” option.
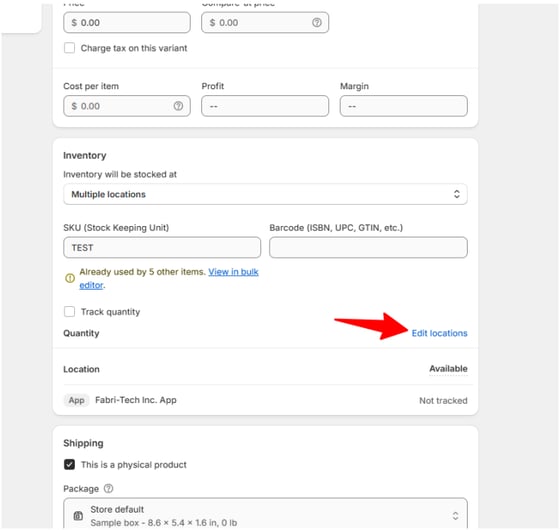
6. Under ‘Edit locations’, confirm your custom app is checked, and uncheck any other
locations from this list.
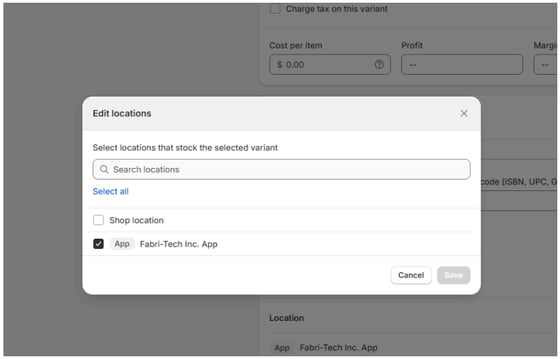
7. For each of your product variants, you need to add:
-
A SKU ID value assigned to the variant
-
Under Edit locations, your app is checked (and all other apps unchecked)
8. Create the FulfillEngine Catalog ID Metafield
In Shopify, navigate to Settings → Custom Data → Metafields and create a new metafield for the FulfillEngine Catalog Product ID.
Configure the metafield with the following values:
- Namespace: fulfillengine
- Key:
catalog_product_id - Type: Single line text
The full metafield definition should be:
fulfillengine.catalog_product_id
This metafield is used to store the FulfillEngine Catalog Product ID for each product.
9. Going back to the product builder page, scroll down to Product Metafields and locate the Fulfill Engine Catalog ID. Enter the product ID of the product here from the Fulfill Engine catalog. This connects your Shopify product to the blank garment in the Fulfill Engine catalog. Include the ID exactly how it appears in the Fulfill Engine catalog.
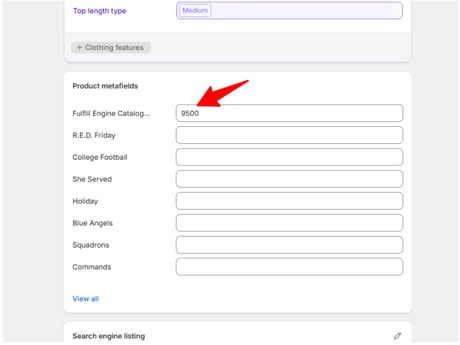
10. Save your product in Shopify in Draft state until you are ready to test orders. You will
now proceed to configure customization options on your product in Customily.
Step 4: Configure Customization Options in Customily
1. Within Customily, select Templates.
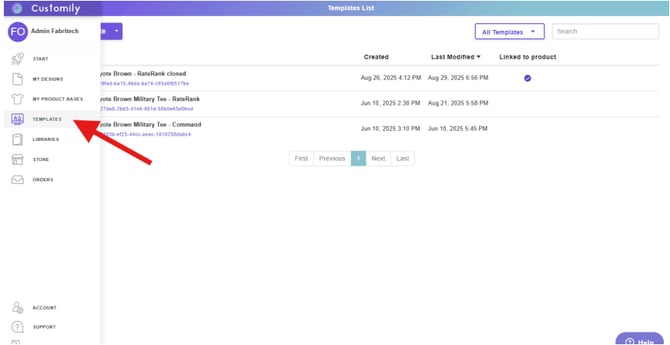
2. On the Templates page, create a new template, or edit an existing template if you
already have one created.
3. When creating a template, name your template (this template name will only show to you
internally). Choose the width and height of your first custom design location. Then select
“Create Page”.
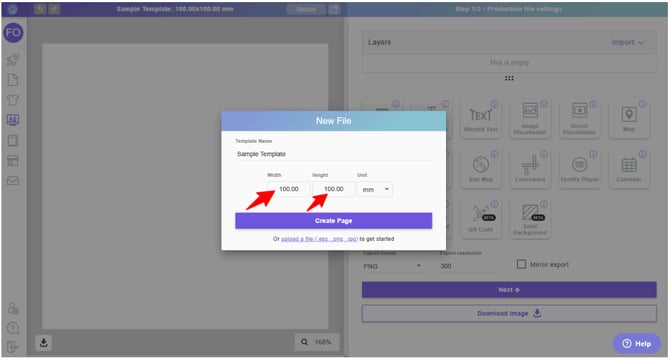
4. After you select “Create Page”, select the “Create file” icon in the top-center of the
template creation window. This allows your Customily design files to be separated by file,
and for those files to have custom names.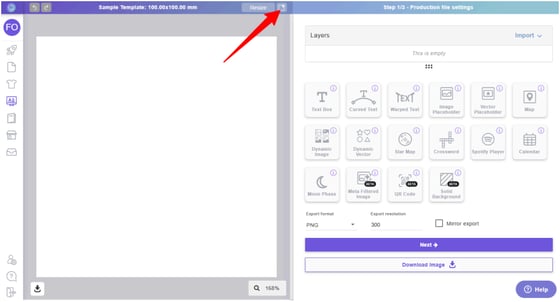
You will see a warning modal pop up warning you that templates with multiple files are
for Shopify, Etsy, and WooCommerce stores. Close the warning modal to proceed.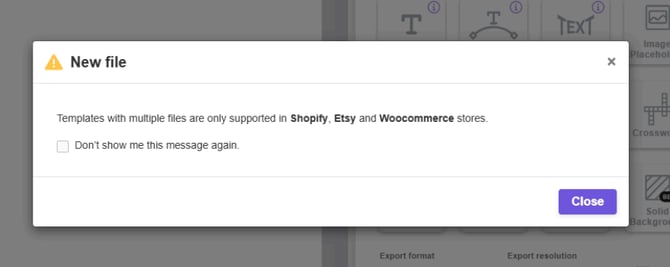
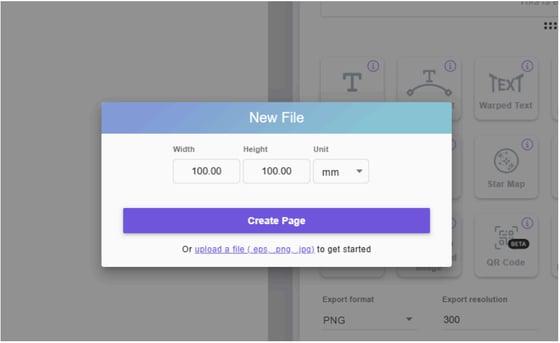
5. After closing the warning modal, you will be asked to provide width and height for a new
customization design file.
A template can contain multiple design files for each individual design customization,
and this new file you are creating will represent your second customization design. For
example, your first file/design may represent the front design of a shirt, and the second
file/design may represent the back of the shirt.
Select the width and height of your second design (you can adjust this later if needed).
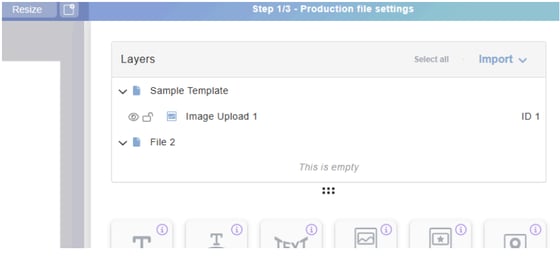
6. Once you’ve added the file, you will see the Layers section on the right side of the
template builder go from a single layer like this example:
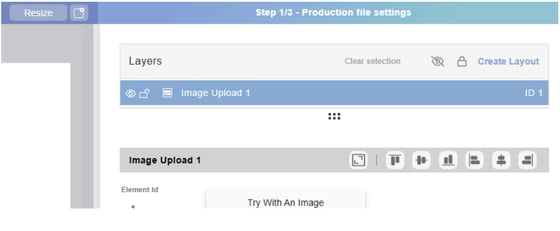
To this view, where your different designs will be nested in multiple layer files, and you
will have the ability to rename the files.
Rename each file to represent the design location/placement and the decoration
method. You can keep these all lowercase and separate the design location and
decoration method with a “+”, no spaces.
a. left_chest+dtf
b. right_chest+dtg
c. back+dtf (for full back)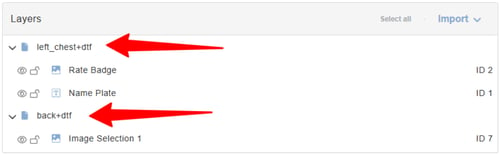
7. Update the width and height of each file’s design area (these must match the max width
and height print areas of Fulfill Engine for a respective design location in Fulfill Engine).
You can change these values of each file by selecting a top-level file, then selecting
“Transform" selection.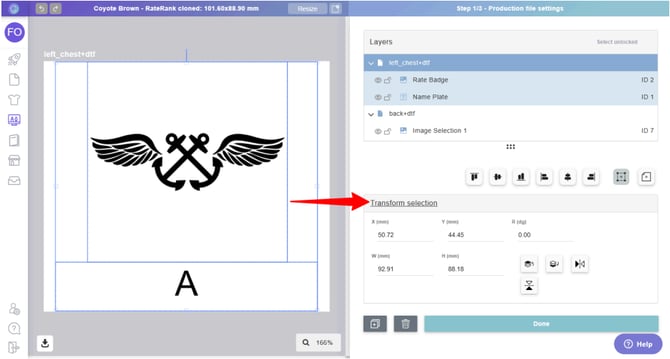
8. Once your width and height are correctly configured for each design file, add your
custom design options such as custom text or an image picker, and nest them under the
files based on the desired location/deco method.
If your width and height are set properly, then generally you can stretch each design to
fill up each respective design area.
9. Once you’ve added your custom design options, select “Next” at the bottom of the
screen to proceed to step 2 within the Customily template designer, Preview Settings.
Preview settings allow you to design the mockup your customers will see when they are
adding customizations on the product.
10. On the Preview Settings screen, select your first file. You will need to add your blank
garment as a layer in this mockup (front in the example), in addition to your
customization option layers for each respective file.
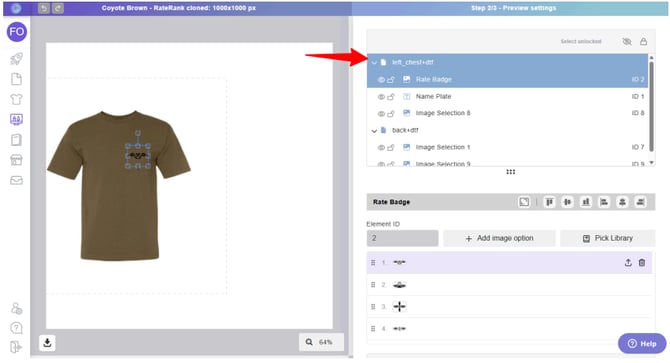
Once the first file layer is configured for the mockup, then select the next layer to
configure. Then proceed adding the blank garment layer (such as the back view) and the
custom design options respective to that design location.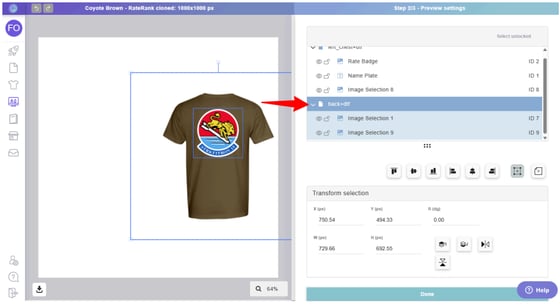
11. Confirm the sizes of each design element in the Preview Settings step match the sizes
you configured in the first step of the template builder before proceeding. Once these are
correctly configured, you can select “Done” at the bottom of the template builder.
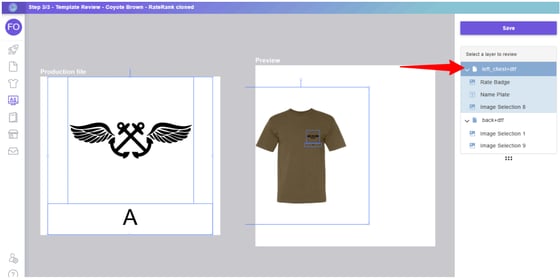
12. The next page will show you the “Template Review” screen. On this screen, you will see
an image of the product file and an image of the preview based on what layers are
selected on the right side of the screen. Here is that screen with the front print location
file selected:
And here is the screen with the back print location file selected:
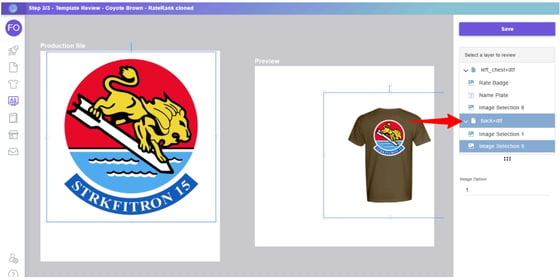
You are unable to preview both files at the same time. This screen will let you confirm your template designs and mockup/preview by checking each file separately.
13. Once you have confirmed everything looks correct, select “Save”. You can now apply
your template to a product.
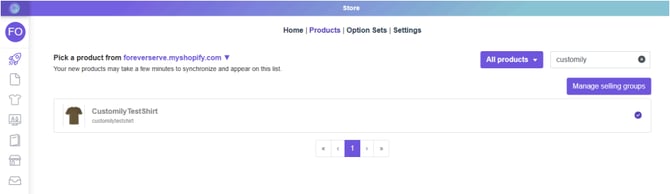
14. Go to the Products page in Customily, find your product, then select it.
15. On the next page, choose the template you created in the previous steps. Then add an
option set. You can create one from the template (Customily does this automatically).
Once you create an option set, it will be stored in your option set inventory for other
products.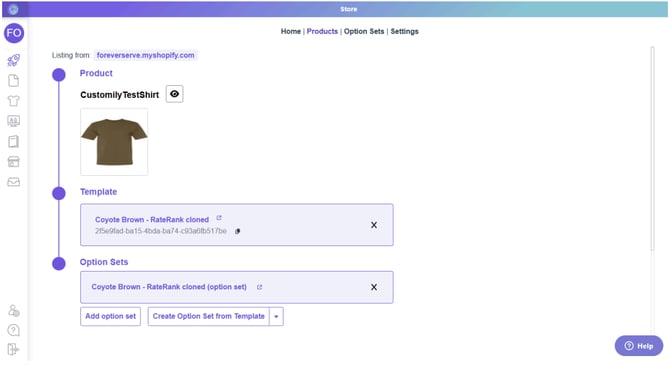
16. Hit “Save” once you’ve selected a template and option set. Then, use the “eye” icon at
the top of the page to preview your product.
Step 5: Test the Complete Workflow
1. Mark your product Draft > Active.
2. Place a test order through your Shopify store using Customily's customization features.
3. Add custom text, images, or designs as a customer would.
4. Complete the checkout process.
5. Verify the order appears in your Fulfill Engine dashboard with:
○ All design files attached
○ Custom specifications included
○ Proper mockup display showing the customized design
○ All customer design choices documented
Orders will take up to 30 minutes to get to Fulfill Engine from Shopify.
7. Note: Products must be in Active status in Shopify in order for those products to be
ordered via Customily customization.
Step 6: Go Live
Once your test order processes successfully through the entire workflow, your store is ready to
offer customized products to customers.
How It Works
When a customer visits your Shopify store:
1. They select a customizable product
2. They see a real-time preview of their customized product
3. They complete their purchase through normal Shopify checkout
4. The order, including all design files and specifications, automatically flows to Fulfill
Engine for production